
Assembly Instructions
Your SideStep arrived with the folding leg unit removed. To assemble:
1.) Remove the lock nuts and washers from the two threaded posts


2.) Slide the larger round tube on the leg unit over the smaller tube on the base unit.
3.) Place the hinges on the leg unit over the threaded posts. The hinges should sit flat on the base tube.
4.) Install the washer and the nut on each of the threaded posts.
5.) Align the legs with the side rails on the base unit and tighten the nuts.

Set Up
The leg unit can be locked in two positions – closed (for transport and storage) and open. To lock closed, fold the leg flat to the bench until the holes align in the sleeved round tubes and re-insert the pin.


To open, remove the pin and rotate the leg away from the bench until the holes align in the sleeved round tubes and re-insert the pin.
Set the SideStep on its feet, and you’re ready to go!
Use


Your SideStep can be used in any configuration: both arms down, both arms raised, or either arm raised. Each side arm can be raised or lowered independently, even while seated on the SideStep.

To raise either arm, simply lift up on the arm. This works best by lifting between the pivot legs. Once the arm is fully raised, press down on the lower pivoting leg (as shown) to lock the arm in place.
To lower, lift up on the arm just above the lower pivoting leg and rotate the arm towards the high end of the SideStep (be sure to keep your fingers out from under the arm while doing this!)


When either arm is raised, extend the stabilizing foot on that side of the SideStep by depressing the button on top of the leg, and sliding it out, until the button pops back into place in the outer hole.
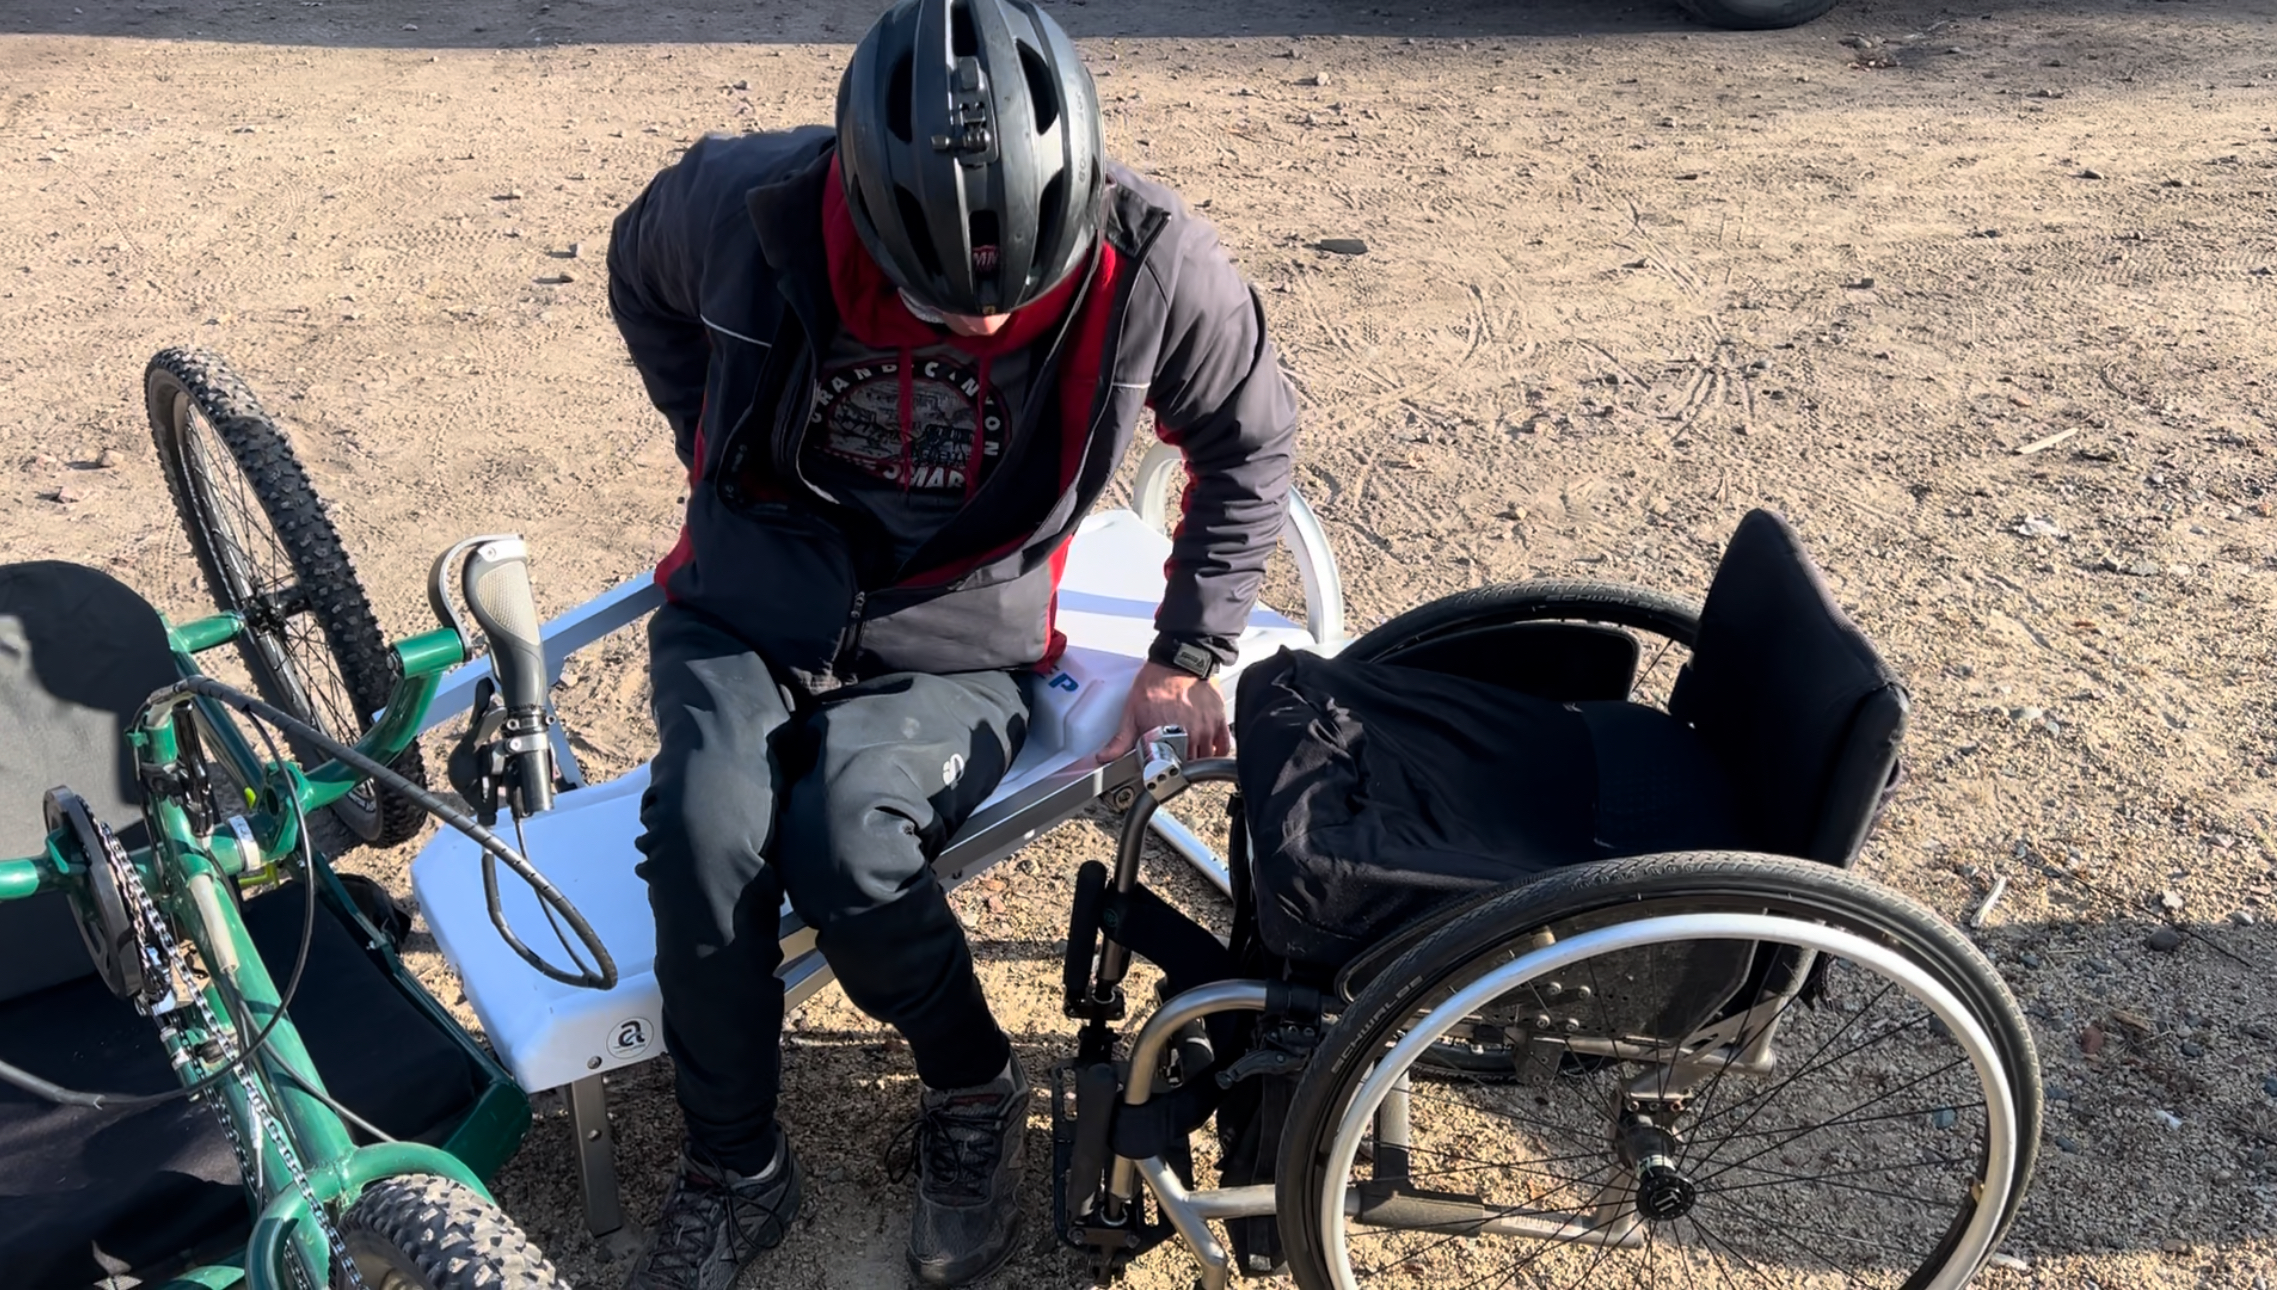
Technique
We know that each person’s style of transfer is unique, and that you are the expert when it comes to your own transfers. That being said, the SideStep was developed with a technique in mind. The reason it’s called SideStep is that your legs can remain off to the side during transfer. Your feet never have to leave the ground. As you can see in the photo below, in that position, your hands are at roughly the same level above your waist, with one hand on the seat above and one hand on the side rail behind you. This allows you to elevate evenly while maintaining contact with the floor. The SideStep is great for transferring in and out of handcycles or any other device, giving you the freedom to move from your chair level to the floor or ground, or anywhere in between.

Cautions
You are the master of your transfer. The SideStep surface is designed to be smooth and springy to provide as much skin protection as possible—but that may not be enough for your skin. We recommend using a pad beneath you during transfers that is sufficient for your skin protection needs. We do have cushions available—please contact us if you’re interested.
Like any transfer, it’s best to practice in a controlled environment with a spotter when first using the SideStep. Keep in mind to keep hands and fingers clear of rotating parts, and understand that even though we have provided stabilizing feet, the unit is not anchored—so it can be tipped if you’re not careful. Again, we recommend using a spotter during your first transfers.
Maintenance
Like anything else, the SideStep requires some care and maintenance. Lubricate all moving parts regularly, and keep them well cleaned. Clean all sliding surfaces with a soft rag and gentle cleanser, and inspect frequently for any scratches or cracks. Store SideStep out of direct sunlight and dry completely when exposed to water (especially chlorinated pool water or salt water). Please contact us for any replacement parts or repairs—we’ll be happy to help.
Thank you for trusting our product. If you have any questions or comments, please don’t hesitate to write or call. Your feedback is very important to us, and we’d love to hear it.
Chosen Valley Creating Ability
107 1st St SW
Chatfield, MN 55923
(507)202-2174 – cell